Refashion: man’s shirt to summer top
Posted: April 21, 2013 Filed under: Dressmaking, Ethical shopping, Refashion, Sustainability | Tags: man's shirt, Refashion 3 CommentsA recent charity shop haul included this H&M man’s cotton shirt. It cost £1.30, is about a medium, and is super soft to the touch. I was very pleased to find it because I had a project in mind for it immediately.

I wanted to make a Wiksten tank top with a button placket down the back. I though a refashion of a man’s shirt would make that easily achievable.
First I grabbed my seam ripper and carefully removed the chest patch pocket; I’ll probably reuse this. I cut the pattern with the front of the shirt as the back and the back as the front. I kept the original hemline as it was curved (like the tank pattern). The sleeves I will use in some later project, no doubt.
Next, using the Wiksten tank pattern, I shaped the neckline and arms. Once they were cut out I French seamed the shoulders and then used a contrasting bias binding to complete the arms and neck.
Here’s the finished garment:


I’m really pleased with it. I was worried the button placket would get puckered where it joins the neckline so I basted it closed and that seems to have done the trick. I haven’t reattached the pocket yet, I still have to decide if I want to do that, but I think it works as it is, and it’s going to be really comfy to wear, being such soft cotton. Bring on the sunshine!
201k, a labour of love
Posted: April 20, 2013 Filed under: Dressmaking, Sustainability, Vintage sewing machines | Tags: restoration, Singer 201k, Vintage sewing machines 2 Comments
Since I fixed my modern Toyota sewing machine last week something amazing has happened. I am not scared of my old sewing machines any more. I am keen to take them apart, have a bit of a tinker, and get them working.
One of those old sewing machines is a Singer 201k from 1953. It was my Nana’s machine which she bought whilst pregnant with my Mum so she could make clothes and things for the home. When my Nana died my Grandad kept everything, pretty much. But, a few years later, he gave me some things, the sewing machine being one of them. I don’t know when it stopped working – my Dad had tried to fix it many years ago – but it must have been a good twenty or twenty five years.
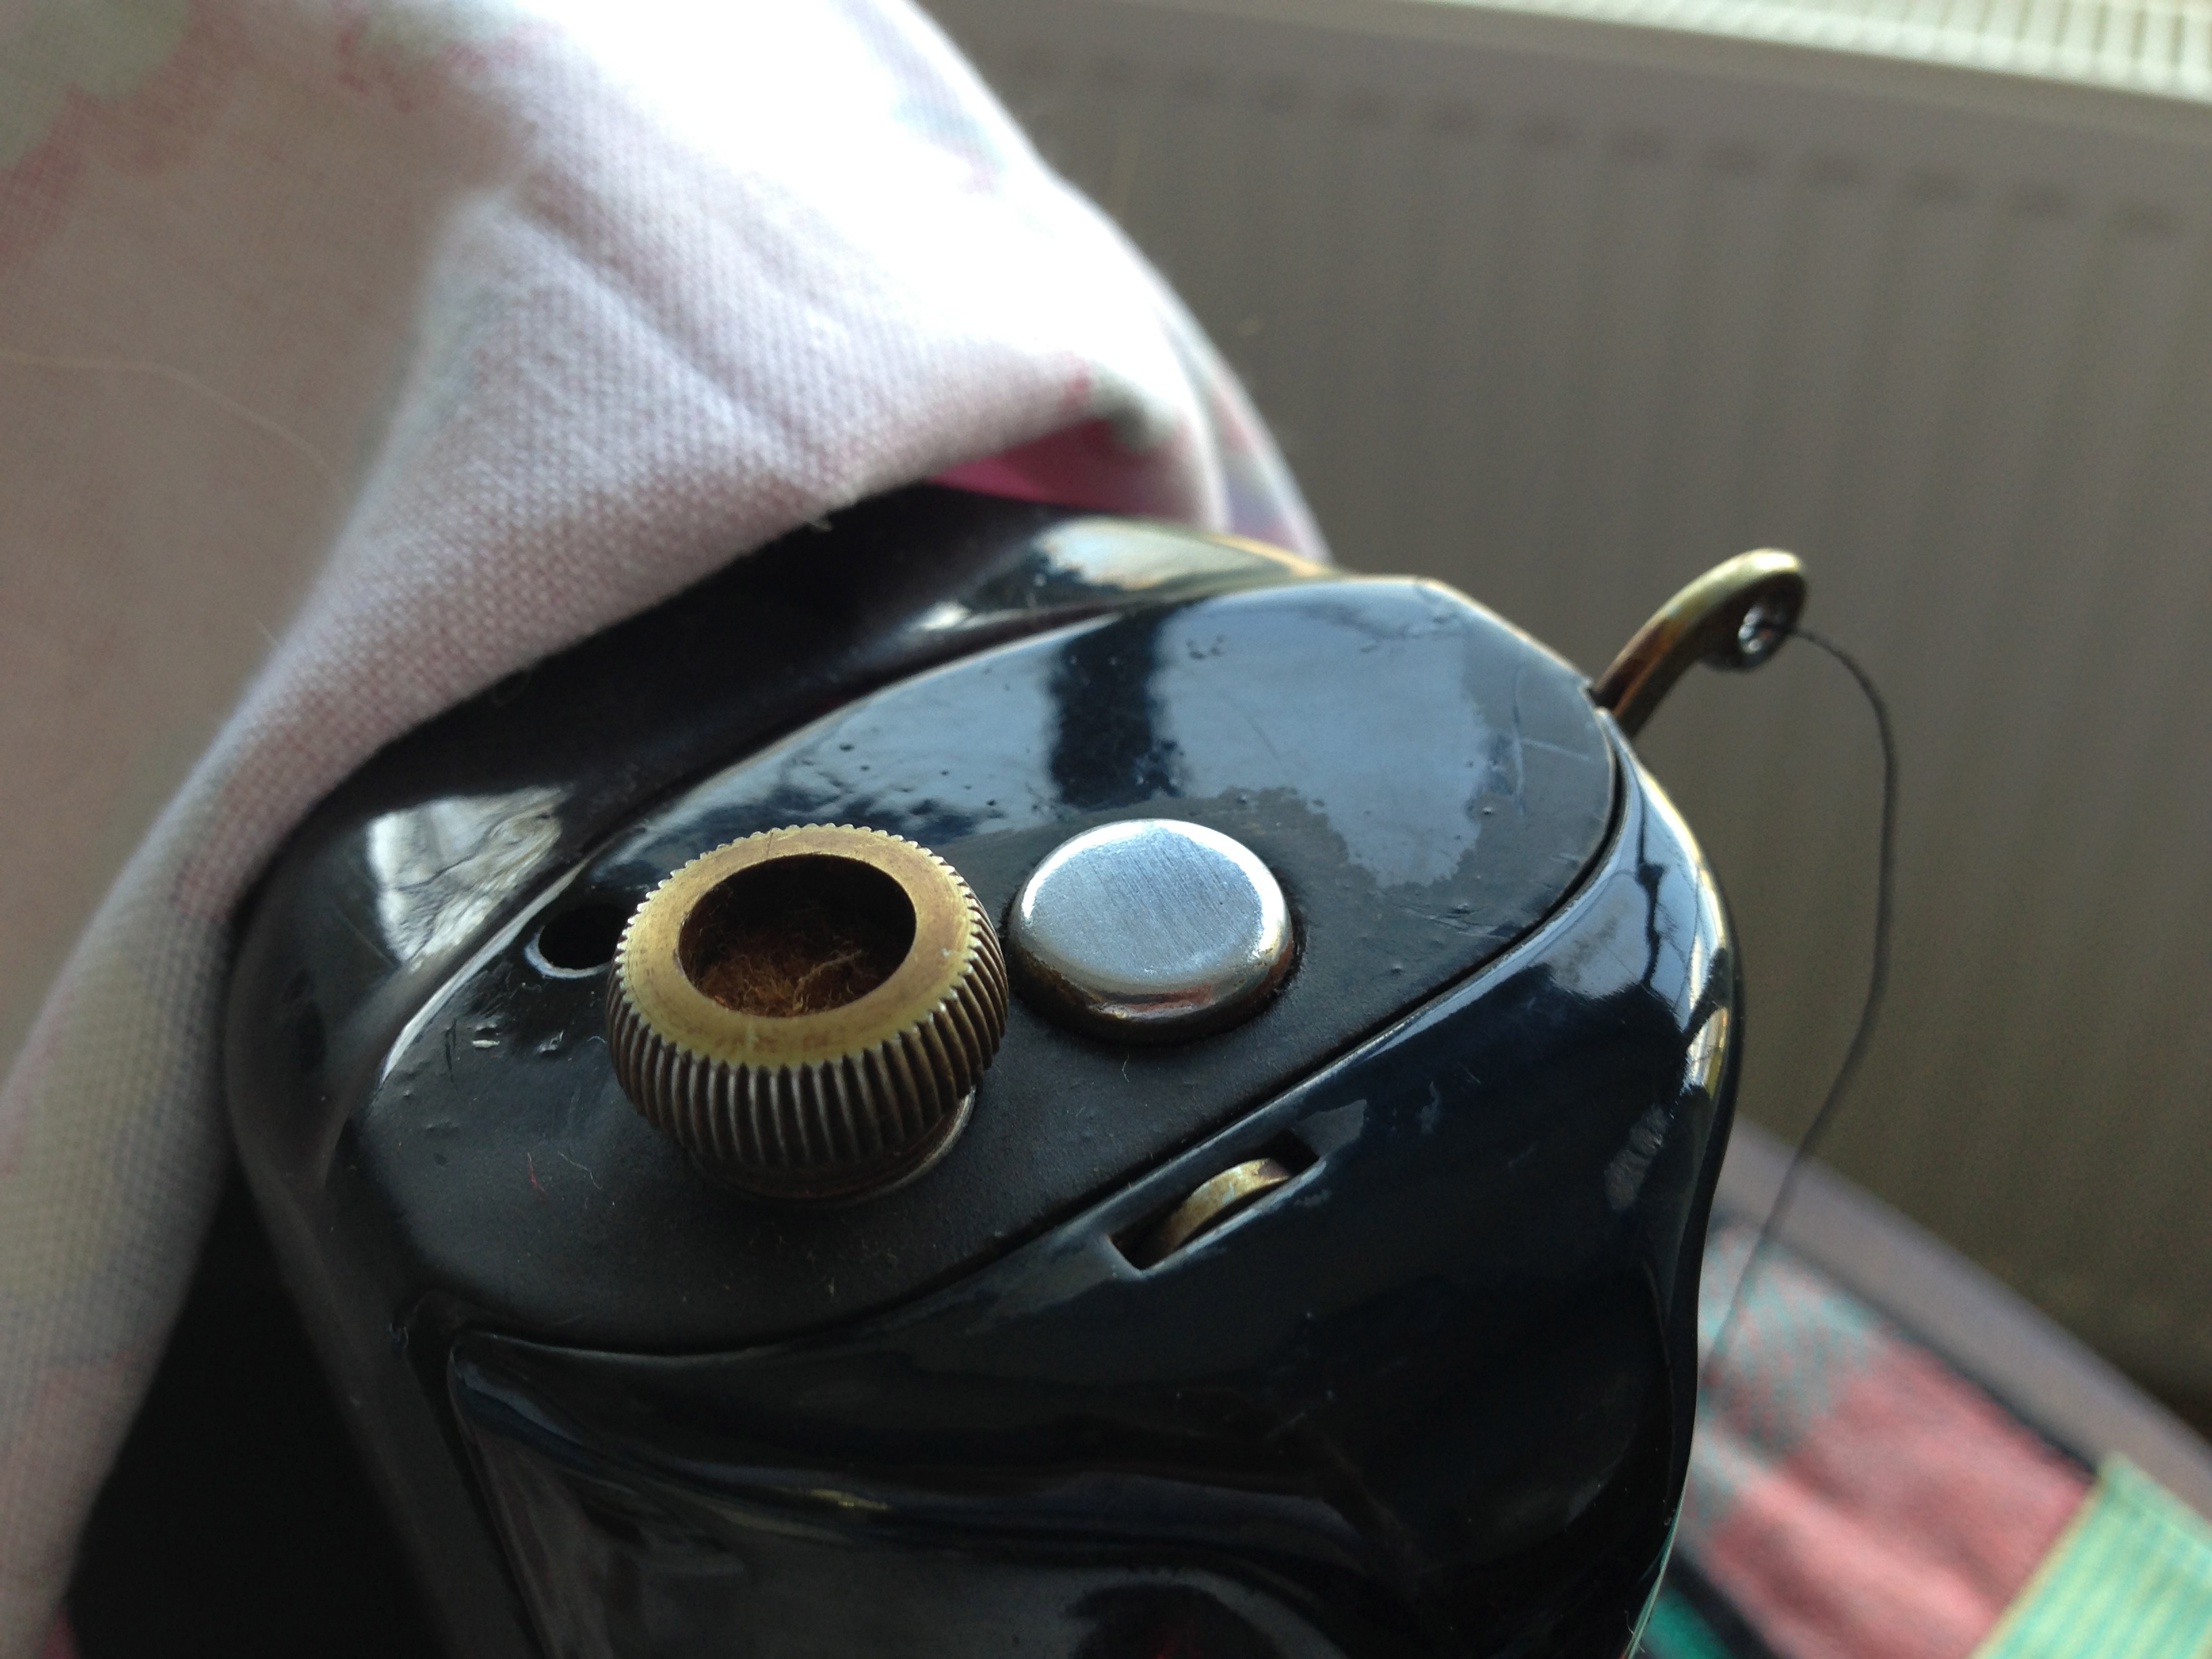
But now, what with the internet, I have the information I need to fix it myself. First things first, I began cleaning twenty years of dust, and fifty years of nicotine staining off the machine and I found, to my delight, that the dull finish you can see in the picture above was just dirt and it (eventually) gave way to a glossy black finish.
I began cleaning it three days ago. I’ve spent a good twelve hours cleaning the crap off and now I can see a rather stunning looking machine emerging. I’ve not finished – I want to do it justice by dismantling it and cleaning it thoroughly – but I can see how amazing it’s going to look.
For now, here’s a good illustration of the before and after state of the metal work. You can also see the dullness (dirty) and the shine (clean) on the japanning.
Edited to add:
I have finished cleaning and repairing the machine. Here it is in all its glory.


Hopefully you can see a distinct difference in shininess from the top photo! I have done some sewing on it this evening and now the belt has given up. I am surprised it even had enough tension in it to do what it did – it’s practically disintegrating. Luckily my local sewing machine shop is a Singer specialist and carries a belt which can replace the 60 year old one that’s currently languishing on my machine!
Treat time!
Posted: April 17, 2013 Filed under: Dogs, Make stuff, Pattern making, The good life | Tags: dog treat bag, Sewing 1 Comment
A bit of a fun project today, I made a treat bag for my dog. I usually just fill my pocket with goodies but with the milder weather I am not wearing my big tweed dog-walking jacket all the time, so I need a portable pocket to make sure I have a tasty stock of bribes with me to keep the pup compliant.

I used some old printed cotton my Mum gave me a couple of weeks ago. It’s been knocking around since we were kids! I had a bag clip in my stash, but no braiding or cord, so I used some ribbon for now (I can always replace this later).
I’m probably going to do a how-to if I get chance, but this was just a trial run because I designed the bag in my sketchbook last night and just want to get it made ready for the weekend.
I’ve been dyeing to use this pun…
Posted: April 10, 2013 Filed under: Make stuff, Refashion, The good life Leave a commentI’m self-employed. And what that means is, as well as untold numbers of cups of tea, a hairy, canine workmate and what ever music I like in the studio, I can also get things done on my lunch break (and those pesky quiet times when things kinda stall).
Today my project is dyeing an old dress. I have had this simple cotton dress for a good few years (to be honest, I can’t remember how long).

The label says it’s a 16, but it is more like a 14. It’s a bit big for a semi-fitted dress, but I can deal with that later. My biggest issue is the colour. It’s, well, pink. And I’m not an especially pink kinda girl. So I am going to give it a dye bath in some Dylon Antique Grey and I’m hoping that it’ll come out okay…

And just for good measure, I’m slinging in an M&S skirt from my local Red Cross shop too. I don’t know how this will take up the colour as it feels like linen but is, according to the label, lyocell…
…A quick look on Wikipedia and I now know that lyocell is a reclaimed wood pulp and therefore, as a natural fibre, should dye well. We shall see. It is currently a stone/natural colour but I want it to have a more drab finish, so it’s going in the grey for a bit.
Fingers crossed…
The purse-suit of happiness
Posted: April 9, 2013 Filed under: Make stuff | Tags: GBSB, Purse, Sewing Leave a comment
Today has been good. I grabbed up some mercerised cotton thread in pretty pastel shades from my local vintage shop and I got some gorgeous coral-coloured cotton fabric from Lincoln market. This evening I tidied my fabric stash, organised my patterns and then settled down for GBSB – love it – and then I made a purse from some fabric scraps.

Spring is springing
Posted: April 8, 2013 Filed under: Green lifestyle, Growing veg, Inspiration, Make stuff, The good life 2 CommentsIt seems to have been forever that I’ve been surviving on a diet of brassicas and root veg, but there’s hope…
Yes, a late spring means slow progress in the garden and whilst I have broad beans waiting to be hardened off and some tough chard and rocket coming on well in the greenhouse, I cannot wait for spring to arrive properly. Warmer weather means my hardy hellibores will get some floral company, first in the firm of an ornamental cherry, then the magnolia and daffodils and tulips will join in. And my plate can feature baby leaf salads, at last, and soon enough some asparagus and rhubarb.
I love the variety, lightness and green-ness of spring veg after the hearty fare of winter.
Sewing talk: Project B (little red top)
Posted: April 4, 2013 Filed under: Dressmaking, Make stuff, Refashion, The good life | Tags: bias binding, cotton flax, Japanese sewing patterns, Sewing talk Leave a commentNow I would be the first to admit that I am a little obsessive about Japanese pattern books. There are so many, they are beautiful to behold, and filled with great ideas. They come with patterns, albeit almost indecipherably overlaid with each other, and they’re great value for money – a pattern book will set you back around £12 and contains 20 or so different garments. Fabulous!
So I thought it was about time I started using mine instead of just stroking the pages and dreaming. I decided to begin with a nice, straight-forward top from Sewing Talk, the only pattern book I have which isn’t translated from it’s native Japanese. I don’t speak Japanese, but I have to say that the diagrams are first-rate and those, coupled with a little experience and some common sense, means they are relatively easy to follow. But just to be sure, I started with something easy.
This is technically a refashion. I have a lovely tunic/dress from Joules.

It’s a cotton/flax blend, really easy to wear but entirely too huge now I have lost weight. So I want to make something which makes the most of the fabric, but fits too. So this seemed the perfect match.
This fabric was a joy to work with. It was a well-loved dress so it’s been washed numerous times giving it a soft, lived in feel (although it hasn’t faded at all). It pressed into crisp, professional-looking seams and hems. I also found a gutermann thread which matched it exactly. All in all this was an easy, fun project.

I did stray from the pattern in a couple of places: I made the top 2″ longer than the pattern to accommodate my body shape better, and I did not gather the bottom hem. I also used bought bias binding in a matching colour as there was just not enough fabric in the dress to make my own. All in all I am very pleased with this one.
I’m going to make it again in some different fabrics because it is such a simple top it is a perfect showcase for a lovely fabric. I am going to do the longer version of it too, to make a dress.
Sewing Bee
Posted: April 4, 2013 Filed under: Inspiration, Make stuff | Tags: Sewing Bee, TV Leave a commentThis week, the BBC began showing The Great British Sewing Bee on BBC2. I have to say, in the midst of a sewing frenzy for me, this is very timely programming. I enjoyed the range of garments made, the history of sewing sections in between the rest of the action, and the general buzz of the competition. I do have to say, though, that being competitive in my sewing had never occurred to me (nor baking, for that matter). It’s fun, and it allows me to have a unique, custom wardrobe of things I like for very little money. To that end, it is nice to hear the stories of the competitors. What motivates them, and the varied backgrounds they have is all really interesting. As is the room they get to sew in – with endless yardage of fabric, trimmings and various notions. I’d love a sewing room like that!
But best of all, I think, is that it shows a variety of sewing and sewists. A higher profile for sewing can only mean more easily available supplies. And that’s no bad thing.
Mustard stripe t-shirt dress
Posted: March 29, 2013 Filed under: Dressmaking, Make stuff, Pattern making, The good life 1 Comment
Ever since I saw this image on Pinterest, I have wanted to make something like it. First I had to find the fabric: Girl Charlee in America came up with the goods, and at a reasonable price, but the shipping costs from America have just got crazy so I shan’t be making a habit of it.

So, now to find a pattern. For this I decided to use a dress I already have, and love, as a template. This dress from Howies is perfect, comfy and nice and simple. So I’m using it to create my new dress.

First I washed and pressed the jersey, to make sure I wasn’t going to experience any nasty shrinkage surprises once my dress was done. Then I laid out my pattern (a cup of tea whilst sewing is, of course, essential).

I cut outside the dress by 1″ on the side seams to give myself room for french seams (that overlocker is just a watched-ebay-auction away!). I also redrew the neckline to lower it slightly.
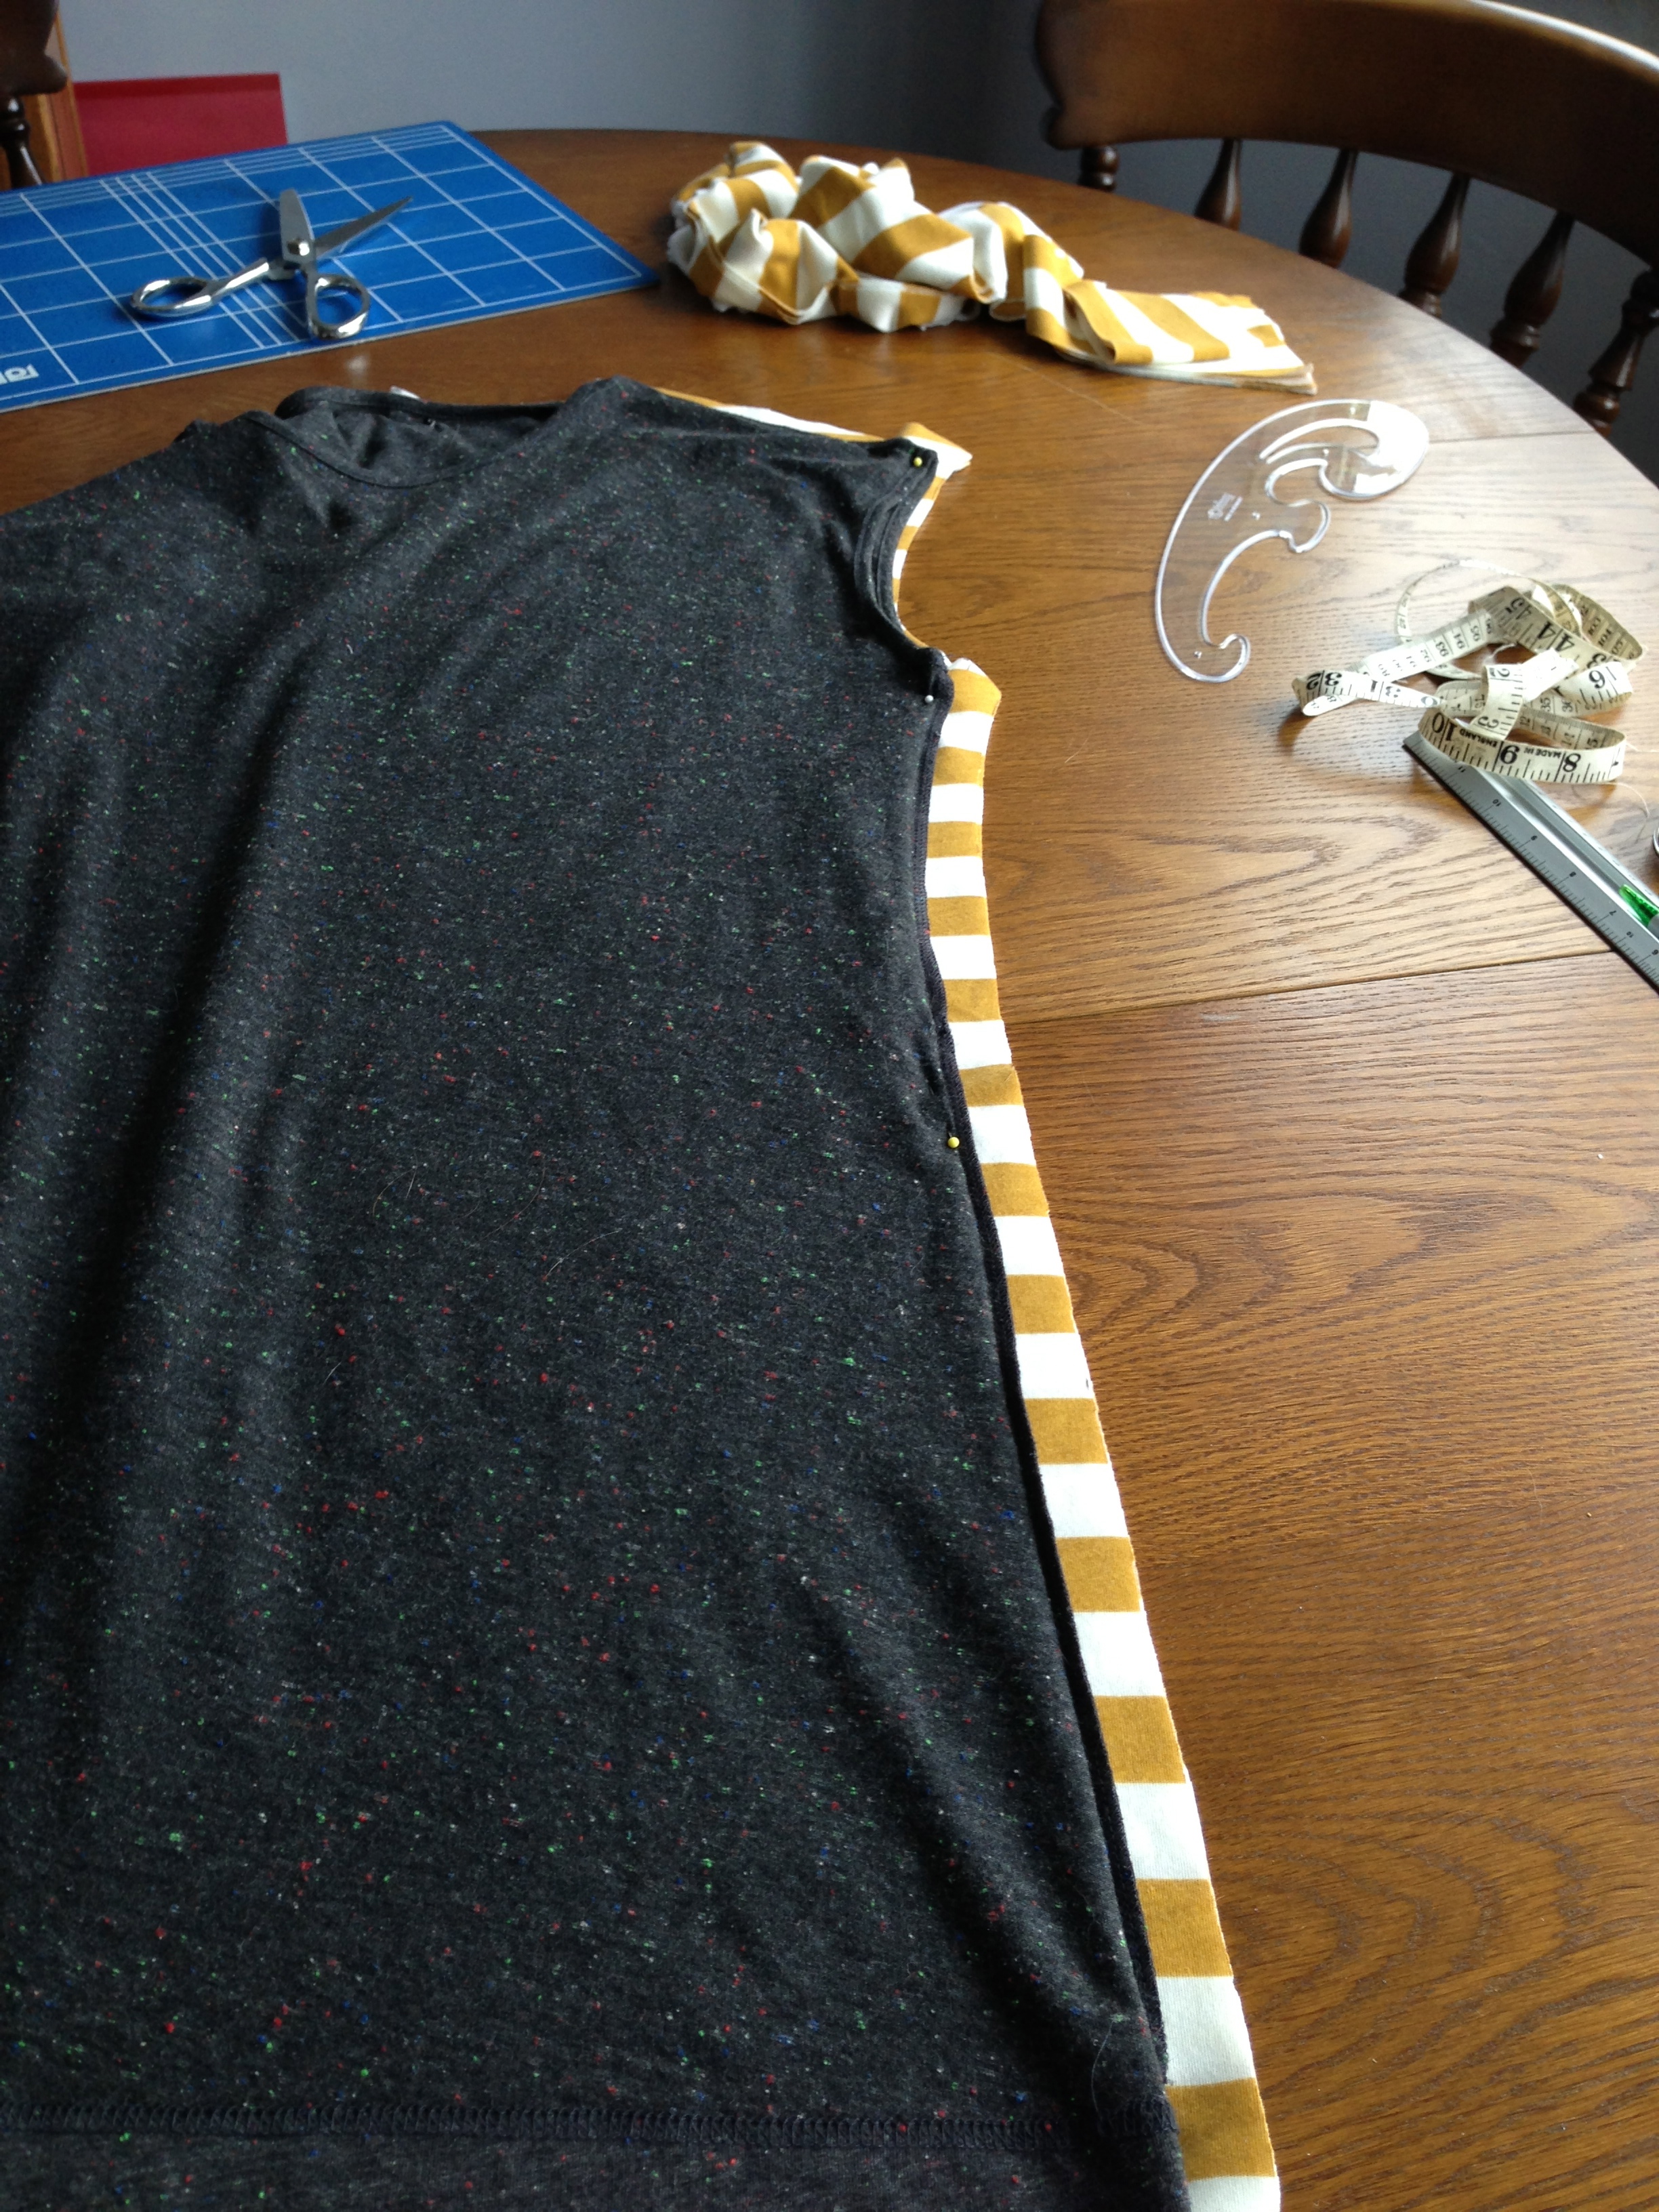
Next I got it all pinned up and sewed the shoulder and side seams.

I always love throwing it on my dress form and seeing it become a proper 3D garment. Exciting!

Next to the neck and arms. I decided to have visible binding on this as I want it to be a more casual dress than the original. So I cut some 1″ lengths and pinned them right side to wrong side and stitched. Then I folded the binding over to the right side, pressed it and tucked the raw edge under, finishing with a slightly wobbly top stitch (because I’m a novice, not on purpose).

Finally I gave it a fairly chunky hem at the bottom and hey presto, my dress.

It’s a little roomy, that can always be adjusted later, but the drape from the jersey is great and it’s really comfy to wear. That’s my first Spring wardrobe item made, now just need some of that Spring weather to go with it!
Making stuff
Posted: March 29, 2013 Filed under: Inspiration, Make stuff, The good life Leave a commentSince I was a child I have loved making things. It was always something I took for granted until I was at university and I met people who couldn’t sew a button back onto a shirt. I have benefitted from a fairly traditional upbringing during which I was taught to knit, sew, crochet, embroider, cook, wire a plug… And I have taught myself new crafts – I can make prints and stencils, draw, make handmade paper and books. I’ve even had a go at weaving, spinning wool, felting, pottery and woodwork. Basically I love to try new mediums with which to shape and decorate my world. It has always been what makes me happy, and it is no less so now that I am a grown-up. In fact the escapism these crafts provide, as well as the ability to create a unique environment for myself, are all the more important now I have bigger responsibilities and things to worry about.
So here’s to the men and women who taught, guided and inspired me over the years. They are many, but most notably the women who raised me: my Mum, and my two lovely grandmothers.

