How quickly the new becomes the everyday…
Posted: September 2, 2013 Filed under: Dogs Leave a comment
Three months ago I adopted another dog, Dora, she came from a local rescue centre and she was a bit of an accident…
It’s a long and not very interesting story, but basically I hadn’t intended on getting her. But then I met her, and she seemed like a perfect little sister for Izzy.
I wasn’t wrong. We’ve had three months together and she has settled in brilliantly. She’s a sweet, clever little girl and she and Izzy love each other. It feels like she’s been here for much longer.
Dogs are brilliant. They are experts at living in the moment. A single, thorough shake can allow them to move from a stressful or exciting moment to a calm one and they just ignore things that cause them concern. There’s a lot was can learn from dogs.
Dog wrangling
Posted: May 28, 2013 Filed under: The good life | Tags: dogs, labradoodle, training 1 Comment
Frequent readers will know I have a much loved and well-hugged labradoodle called Izzy. She is my best friend, and she is such good company. Recently we have completed a course of puppy training (okay, she’s two, but labradoodles are always puppies) with Fern Ember from HappyPaws. This course was a revelation because it not only helped me teach Izzy things, it helped Izzy teach me things. Like how much she loved the format of having an hour of performing tasks. And how quickly she picks things up – she was working out what I wanted before I had shown it to her.And how much she likes running around with me and jumping over things! She’s also a great communicator – with me and other dogs. I have also seen her split dogs she felt were getting over excited or upset with each other. She’s just brilliant.
Refashion: man’s shirt to summer top
Posted: April 21, 2013 Filed under: Dressmaking, Ethical shopping, Refashion, Sustainability | Tags: man's shirt, Refashion 3 CommentsA recent charity shop haul included this H&M man’s cotton shirt. It cost £1.30, is about a medium, and is super soft to the touch. I was very pleased to find it because I had a project in mind for it immediately.

I wanted to make a Wiksten tank top with a button placket down the back. I though a refashion of a man’s shirt would make that easily achievable.
First I grabbed my seam ripper and carefully removed the chest patch pocket; I’ll probably reuse this. I cut the pattern with the front of the shirt as the back and the back as the front. I kept the original hemline as it was curved (like the tank pattern). The sleeves I will use in some later project, no doubt.
Next, using the Wiksten tank pattern, I shaped the neckline and arms. Once they were cut out I French seamed the shoulders and then used a contrasting bias binding to complete the arms and neck.
Here’s the finished garment:


I’m really pleased with it. I was worried the button placket would get puckered where it joins the neckline so I basted it closed and that seems to have done the trick. I haven’t reattached the pocket yet, I still have to decide if I want to do that, but I think it works as it is, and it’s going to be really comfy to wear, being such soft cotton. Bring on the sunshine!
201k, a labour of love
Posted: April 20, 2013 Filed under: Dressmaking, Sustainability, Vintage sewing machines | Tags: restoration, Singer 201k, Vintage sewing machines 2 Comments
Since I fixed my modern Toyota sewing machine last week something amazing has happened. I am not scared of my old sewing machines any more. I am keen to take them apart, have a bit of a tinker, and get them working.
One of those old sewing machines is a Singer 201k from 1953. It was my Nana’s machine which she bought whilst pregnant with my Mum so she could make clothes and things for the home. When my Nana died my Grandad kept everything, pretty much. But, a few years later, he gave me some things, the sewing machine being one of them. I don’t know when it stopped working – my Dad had tried to fix it many years ago – but it must have been a good twenty or twenty five years.
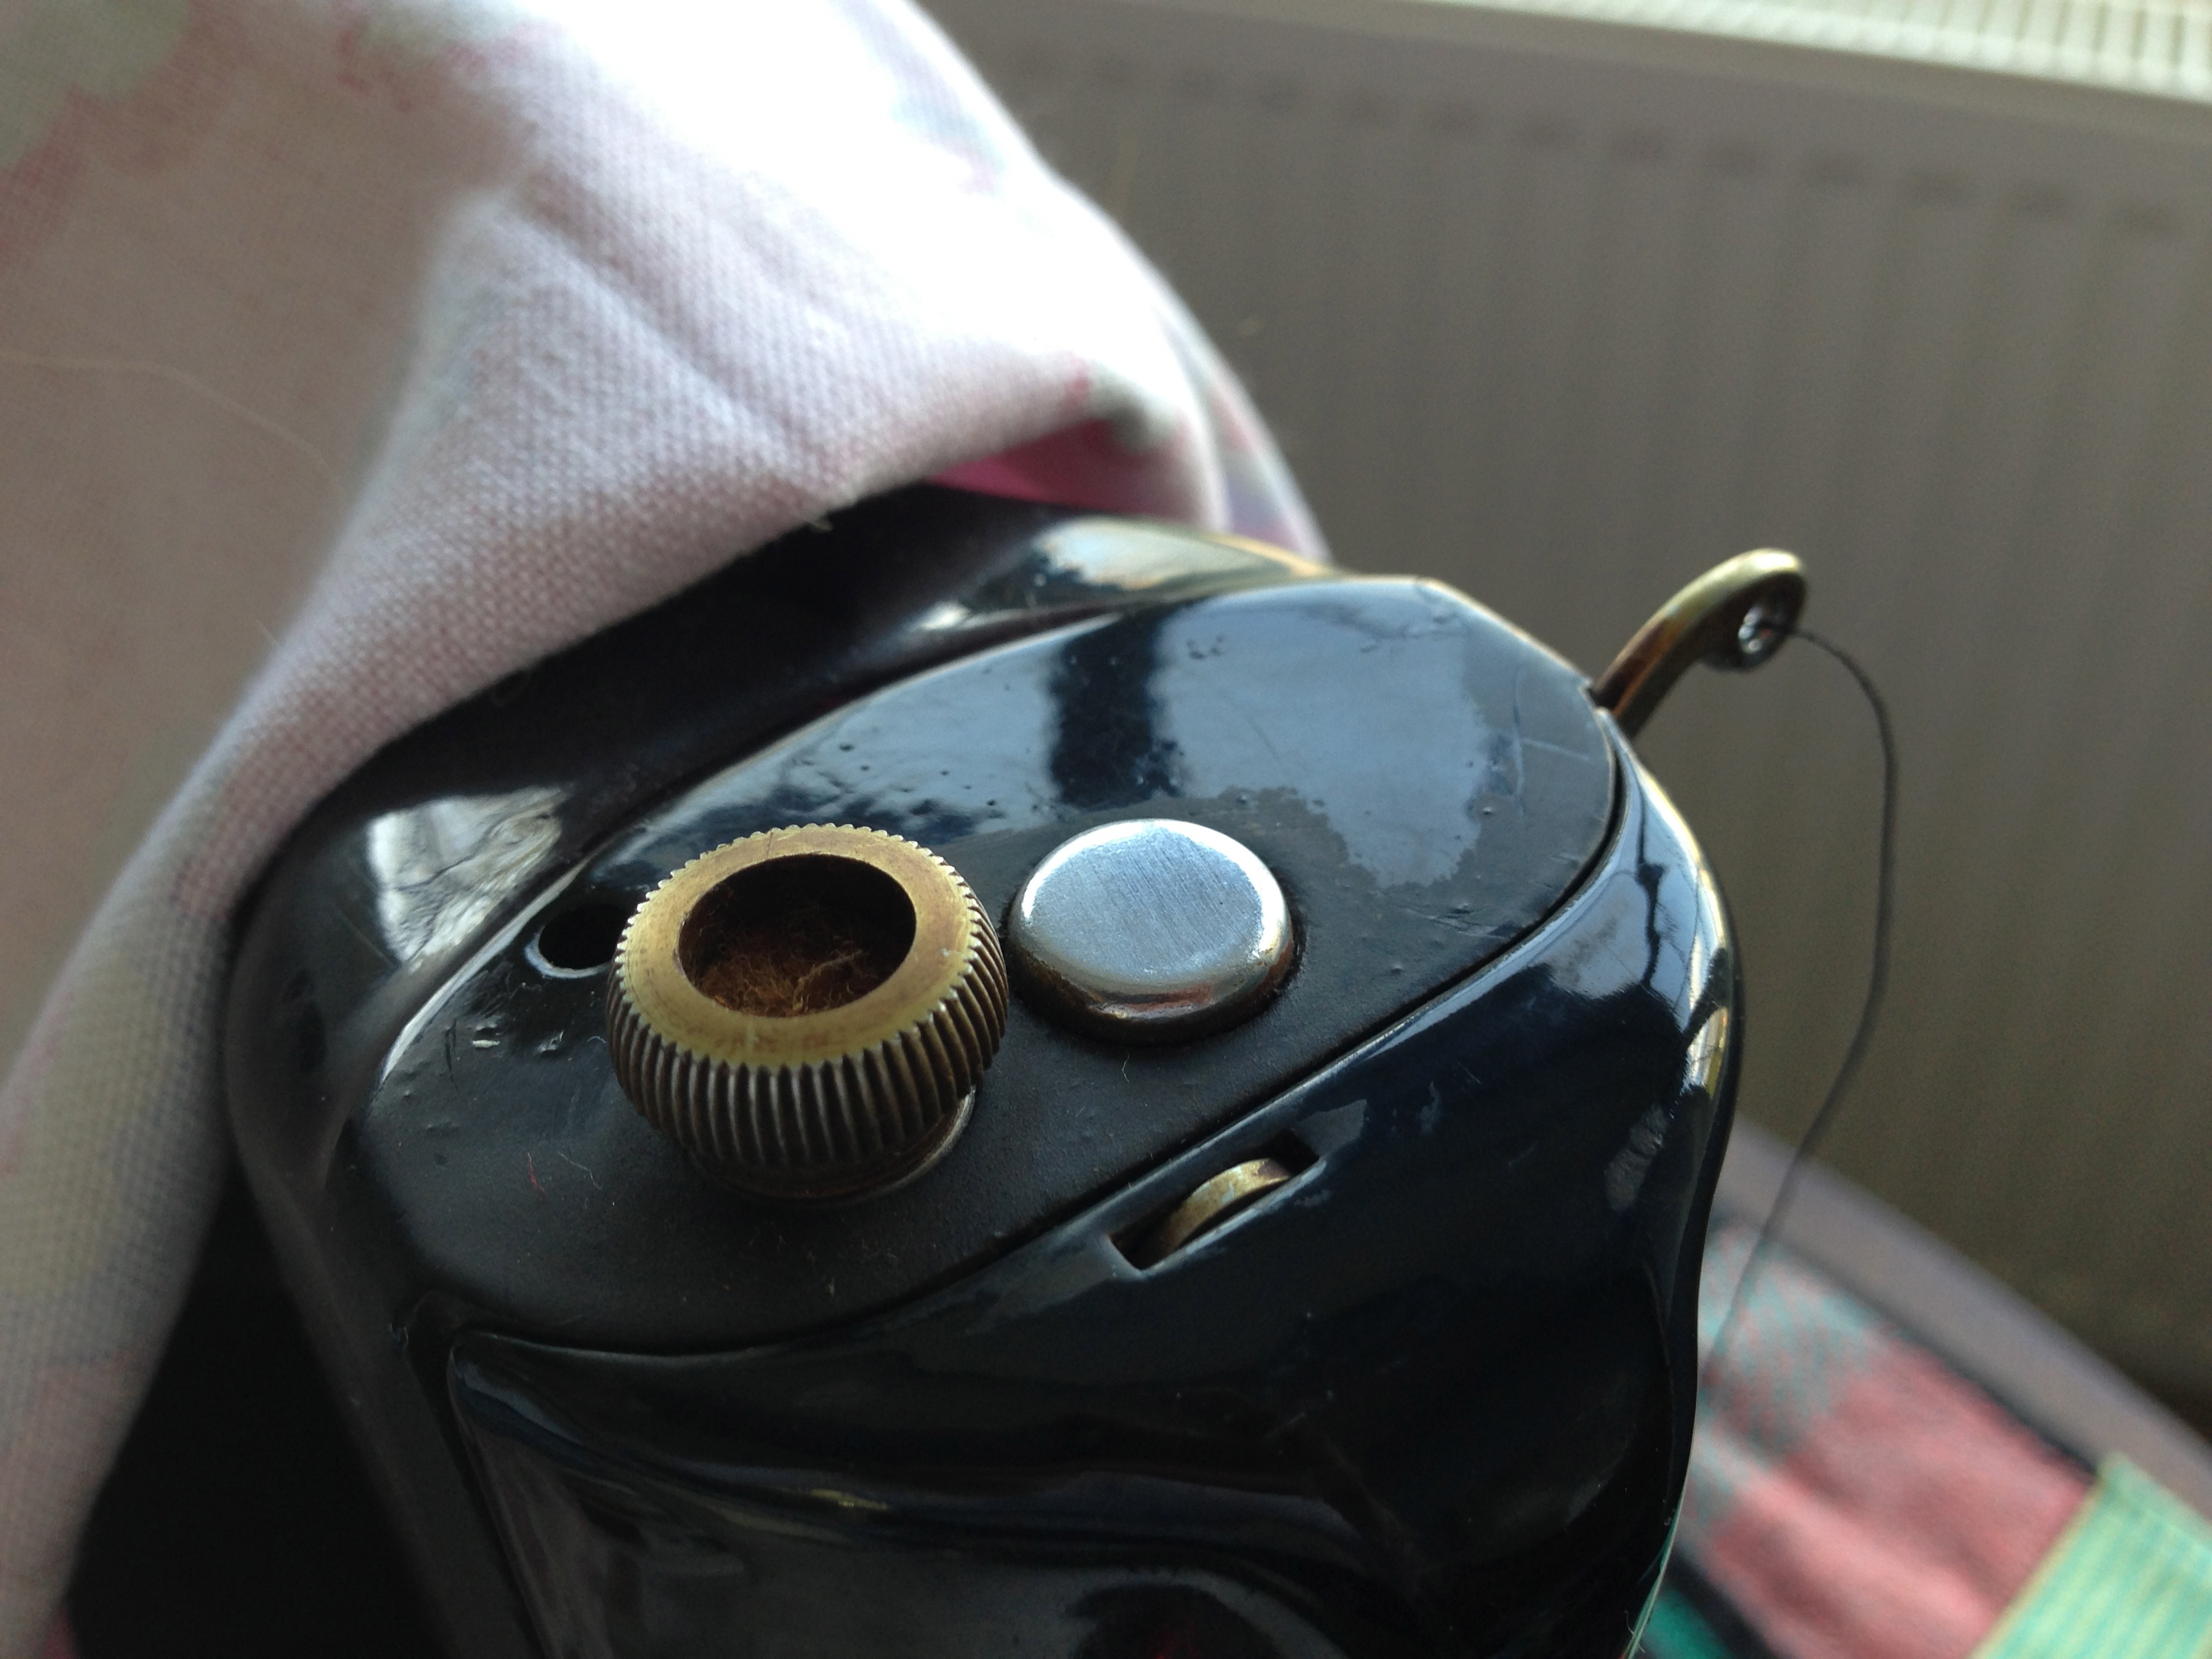
But now, what with the internet, I have the information I need to fix it myself. First things first, I began cleaning twenty years of dust, and fifty years of nicotine staining off the machine and I found, to my delight, that the dull finish you can see in the picture above was just dirt and it (eventually) gave way to a glossy black finish.
I began cleaning it three days ago. I’ve spent a good twelve hours cleaning the crap off and now I can see a rather stunning looking machine emerging. I’ve not finished – I want to do it justice by dismantling it and cleaning it thoroughly – but I can see how amazing it’s going to look.
For now, here’s a good illustration of the before and after state of the metal work. You can also see the dullness (dirty) and the shine (clean) on the japanning.
Edited to add:
I have finished cleaning and repairing the machine. Here it is in all its glory.


Hopefully you can see a distinct difference in shininess from the top photo! I have done some sewing on it this evening and now the belt has given up. I am surprised it even had enough tension in it to do what it did – it’s practically disintegrating. Luckily my local sewing machine shop is a Singer specialist and carries a belt which can replace the 60 year old one that’s currently languishing on my machine!
Putting new rubber feet on my Singer 211k
Posted: April 20, 2013 Filed under: The good life, Vintage sewing machines Leave a comment
So my new machine sews beautifully. It’s been well maintained everywhere…except the feet. It’s little wonder that after 56 years of regular use even a lightweight machine would be having some foot issues. The ones on this have long flattened to pancakes and, on one corner, left an exposed screw (which my oak sideboard found out to its detriment – I shan’t be making that mistake again!).
I ordered some new feet from Graham at singer-feathweight.com and they arrived within 24 hours. What service! That was the easy bit.
Now one of the things I love about these machines is that someone with a bit of an idea about machines (or none, in fact) can work out how they work, how to dismantle and clean them, how to oil and maintain them and how to replace parts for repairs when needed. In the spirit of self-sufficiency, this makes me happy. So I filpped me featherweight on to it’s side, resting on a good wodge of newspaper and with the table in the ‘up’ position to give it some stability.
The feet were, largely, dry crusty, hardened rubber. But one of them was soft and gooey. That was the one which made the most mess to scoop out but the whole process was pretty messy (hence that newspaper). I used a small screwdriver to scrape the perished rubber out of the foot holes and a ratchet screwdriver to loosen the gummed-in screws.

And once the holes were clear of gunk, in went the lovely new feet, fitted perfectly and screws went back in like a dream. Job done.

New (old) machine
Posted: April 18, 2013 Filed under: The good life | Tags: collectable, sewing machine, Singer 221K, Vintage sewing machines 2 Comments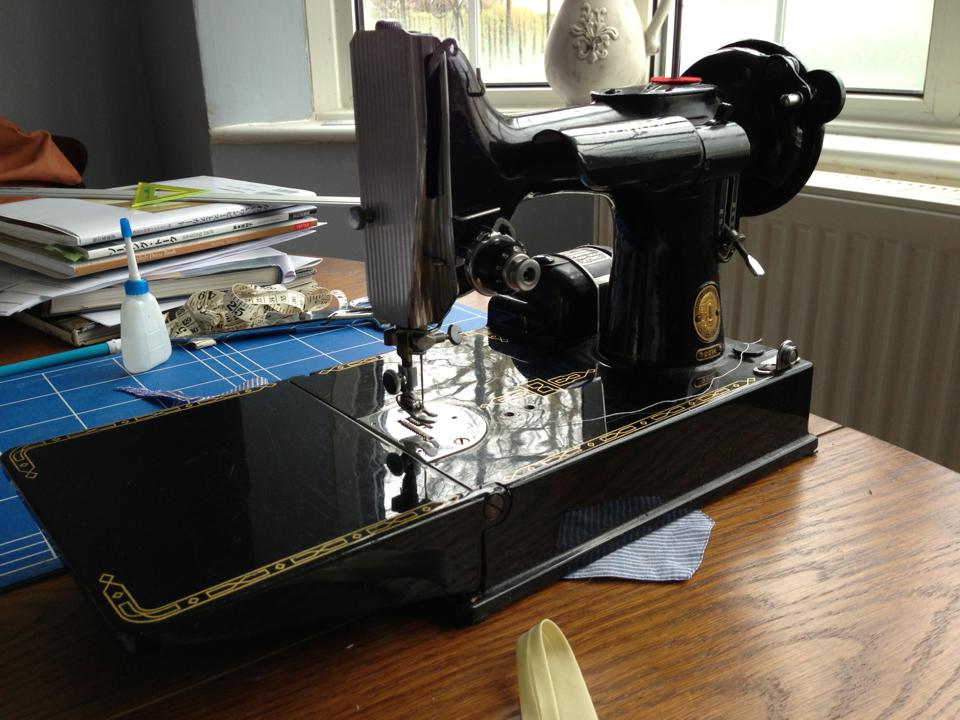
Future posts will reveal my interest (obsession?) for vintage Singer sewing machines and I recently decided I really must have a featherweight machine. This takes my overall sewing machine count to five. Which I think is perfectly reasonable.
I bid on a couple of machines on ebay and eventually won this one. It arrived first thing this morning. I have to say I am elated. It was sold by the lady who bought it new, 56 years ago, and has been carefully maintained and regularly serviced over the years. I have cleaned and oiled it, threaded it up and done a test run. It is wonderful. It is so quiet and efficient. I am looking forward to doing loads of sewing on this little machine. There’s something so soulful about a piece of machinery which has lived alongside people for more than half a century. I am happy to give it a new home!
Treat time!
Posted: April 17, 2013 Filed under: Dogs, Make stuff, Pattern making, The good life | Tags: dog treat bag, Sewing 1 Comment
A bit of a fun project today, I made a treat bag for my dog. I usually just fill my pocket with goodies but with the milder weather I am not wearing my big tweed dog-walking jacket all the time, so I need a portable pocket to make sure I have a tasty stock of bribes with me to keep the pup compliant.

I used some old printed cotton my Mum gave me a couple of weeks ago. It’s been knocking around since we were kids! I had a bag clip in my stash, but no braiding or cord, so I used some ribbon for now (I can always replace this later).
I’m probably going to do a how-to if I get chance, but this was just a trial run because I designed the bag in my sketchbook last night and just want to get it made ready for the weekend.
Adventures in sewing machine maintenance
Posted: April 17, 2013 Filed under: The good life | Tags: fixed!, maintenance, sewing machine, tension, trouble shooting Leave a commentThis morning the unheard of happened.
My 1980s Toyota machine stopped working.
I have had this machine for eight or nine years, most of which it spent living in its bag, only brought out for Hallowe’en costume duties. And when, a few months ago, I decided to make some real use of it, it worked perfectly without any protestations.
But today it went wrong. The tension in the top stitch went so tight it was pulling the thread from the bobbin up through the needle.
As it’s never gone wrong, I have never worried about how to adjust the tension in stitches, and even then it seemed odd that it would suddenly have a tension issue when it’s been working perfectly up to now.
So I got out my screwdriver, oil bottle and manual and I cleaned and oiled it EVERYWHERE. And now it’s purring like a contented kitty-cat. Hurrah. Needless to say I feel a certain degree of smugness at fixing it myself but, practically, I now know how to go about looking after the machine in the future and, given the amount of work it’s doing at the moment, I this will be very useful.
I’ve been dyeing to use this pun…
Posted: April 10, 2013 Filed under: Make stuff, Refashion, The good life Leave a commentI’m self-employed. And what that means is, as well as untold numbers of cups of tea, a hairy, canine workmate and what ever music I like in the studio, I can also get things done on my lunch break (and those pesky quiet times when things kinda stall).
Today my project is dyeing an old dress. I have had this simple cotton dress for a good few years (to be honest, I can’t remember how long).

The label says it’s a 16, but it is more like a 14. It’s a bit big for a semi-fitted dress, but I can deal with that later. My biggest issue is the colour. It’s, well, pink. And I’m not an especially pink kinda girl. So I am going to give it a dye bath in some Dylon Antique Grey and I’m hoping that it’ll come out okay…

And just for good measure, I’m slinging in an M&S skirt from my local Red Cross shop too. I don’t know how this will take up the colour as it feels like linen but is, according to the label, lyocell…
…A quick look on Wikipedia and I now know that lyocell is a reclaimed wood pulp and therefore, as a natural fibre, should dye well. We shall see. It is currently a stone/natural colour but I want it to have a more drab finish, so it’s going in the grey for a bit.
Fingers crossed…
The purse-suit of happiness
Posted: April 9, 2013 Filed under: Make stuff | Tags: GBSB, Purse, Sewing Leave a comment
Today has been good. I grabbed up some mercerised cotton thread in pretty pastel shades from my local vintage shop and I got some gorgeous coral-coloured cotton fabric from Lincoln market. This evening I tidied my fabric stash, organised my patterns and then settled down for GBSB – love it – and then I made a purse from some fabric scraps.


